Using legacy animation in Unity3D 5.x
So Unity 5 came out with the new Animator system, the complexity and flexibility of which may or may not fit well to your workflow. If you’re like me, your game requires very simple animations and you want to manually trigger animation clips inside your code then the legacy system fits you perfectly.
Unfortunately, Unity’s official documentation is quite incomprehensible on this and it took me quite a while to figure out how to do it. This guide was written for Unity3D 5.4.2f2.
Please note that this system has been officially deemed legacy and might be removed in the future. You have been warned.
-
First create an animation clip by going to the Animation window, select the GameObject you wish to animate and click create according to the official guide.
-
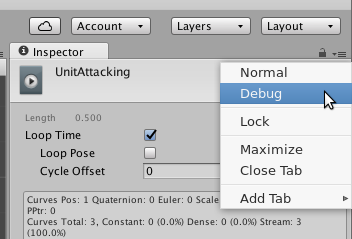
Then you have to mark that clip as legacy by selecting that clip, switch the inspector to Debug mode:
Toggle the Legacy mark then turn off debug mode.
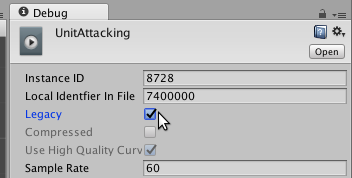
From now on, all new animation clips will be created as legacy. If you don’t do this, the Animation component we add in the next step will not be able to find your clip.
-
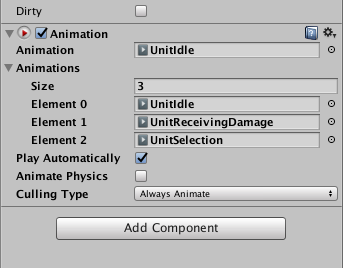
Add an Animation component to the GameObject then drag and drop the animation clips you want to use into that Animation component
-
Inside your controller script for that object, you can now use the Animation API:
var anim = this.GetComponent<Animation> ();
anim.Play("UnitReceivingDamage");

// or
anim.CrossFade("UnitReceivingDamage");
-
If there is a default animation clip, that clip will be played even if you don’t call Play or CrossFade explicitly.
-
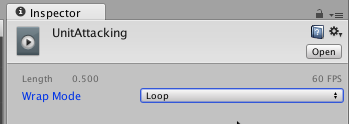
If you want an animation to loop, go to the clip inspector and choose Loop.